Updated Apr 2025: We now have two young kids and are still using the same travel set up for both of them! The only difference is that our youngest is still in the travel crib, while we moved our daughter to an inflatable bed. We’ve brought and used our Nanit cameras and Hatch sound machines on many trips and in many hotels now, and I can confirm that this is the best setup for traveling with Nanit or other WiFi cameras on public hotel networks or no password WIFi networks.
Traveling with a baby or toddler is not easy. But it’s always worth it to see the world in their eyes. However, when traveling, we aren’t willing to sacrifice our sleep or peace of mind — and so it’s important that we can keep an eye on our kids using a Nanit WiFi camera even while in hotels, and help provide a dark sleeping space so they don’t wake up early.
There are a few things that make our lives easier when on the go, like blackout curtains or tent, travel crib or inflatable bed, and travel sound machine. Sharing some of our favorites (Note: all are affiliate links) below; I also share how to use your Nanit while traveling in hotels (works for other WiFi based cameras too)!
Our favorite baby/toddler travel items:
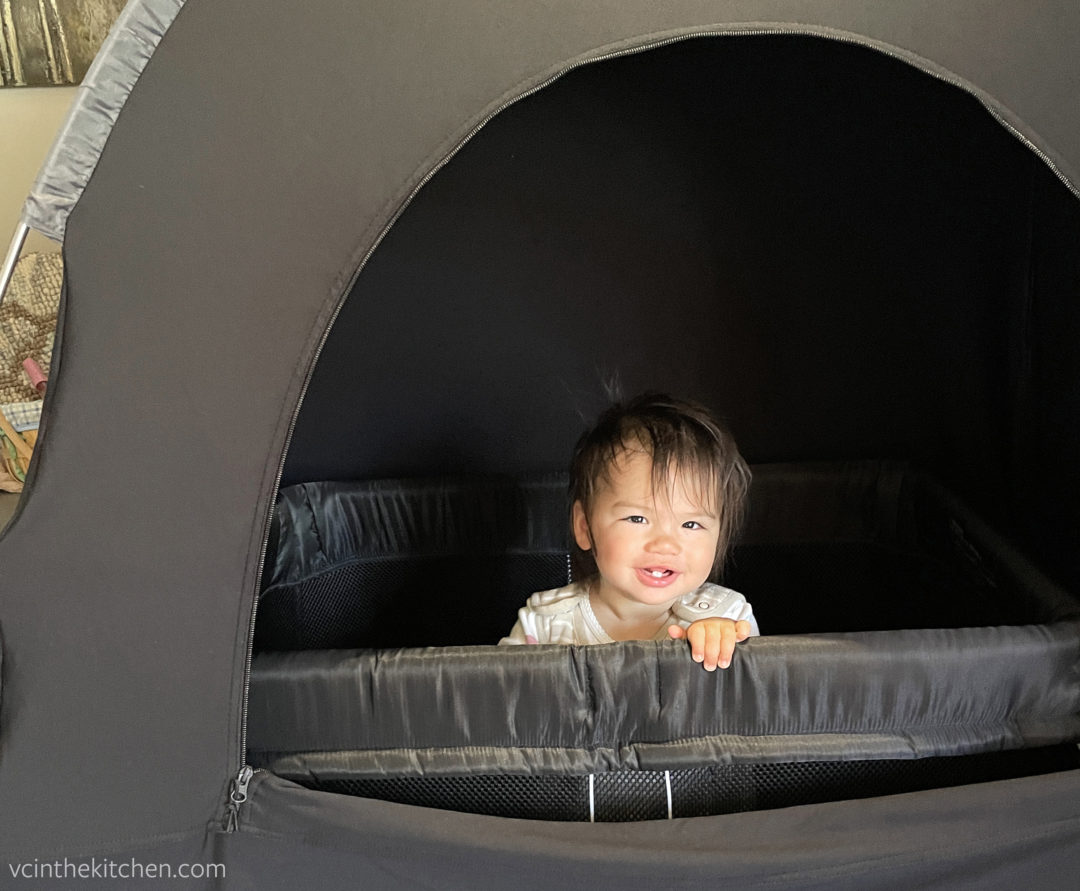
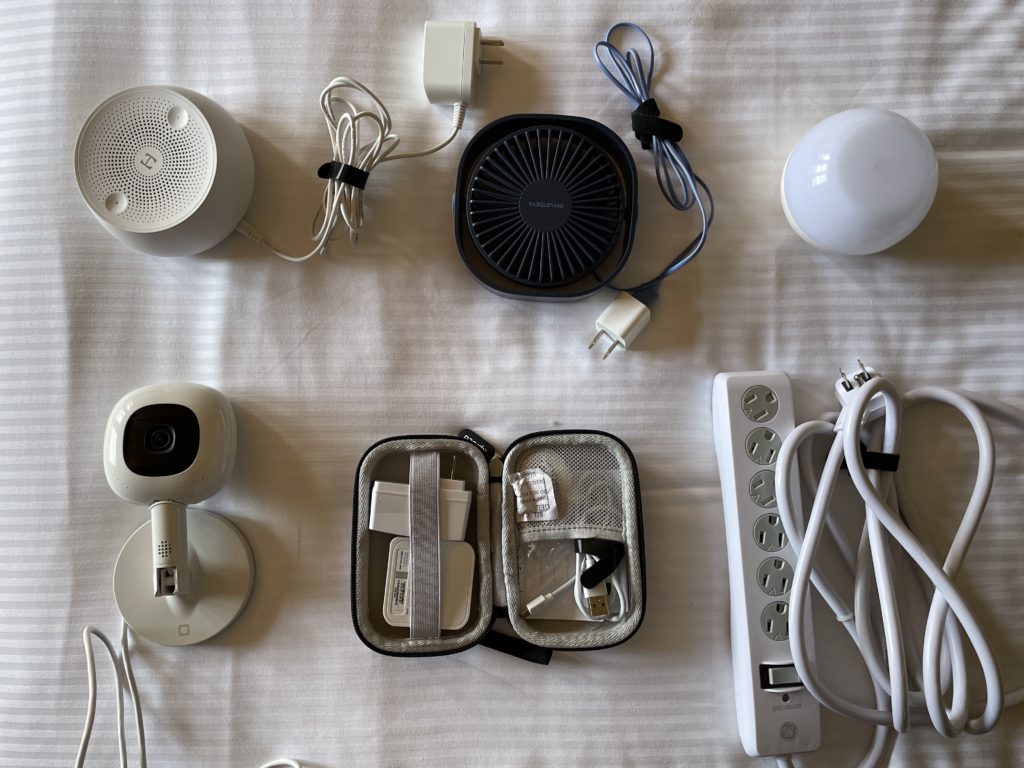
- Slumperpod – A blackout tent that goes over almost all travel cribs or playpens. Essential for us if sharing a room with a baby since you don’t have to go hide in the bathroom or stumble around in the dark! We bought a separate small USB fan to be used since the Slumberpod brand was out of stock at the time, and it fit perfectly in the fan pouch. We have two; one for our youngest and we still use this for our 4 year old with an inflatable bed, esp. if we don’t have a separate room for our eldest to sleep in. Alternatively, you can bring suction travel blackout curtains to darken the room, but we prefer the Slumberpod so we can still use the space while the kids sleep!
- BabyBjorn Travel Crib – Pack and plays are too heavy for plane travel, so invest in a travel crib. The BabyBjorn and the Guava Lotus are probably the most popular options around. We chose this since we’ve loved our other BabyBjorn gear and read that the crib mattress is slightly thicker than the Lotus. Although I know some parents prefer the Lotus due to the side door. Regardless, we love this crib and our kids have slept well in them.
- For older kids, you can graduate them to an inflatable travel bed instead, which still fits a Slumberpod. Our daughter now uses this one from Hiccapop due to the lifetime warranty. It packs down pretty small and comes with a plug-in air pump and patches in case of holes (which we haven’t had to use yet despite multiple trips). Slumberpod also makes a similar one (the Slumbertot) but it’s shorter so I felt like it wouldn’t last us as long.
- Hatch Rest / Hatch Rest Go Sound Machine – We use the Hatch Rest at home all the time for both kids, and love the different white noise sounds and customization. Our default is the rain sound, which we’ve used with both kids since birth. They used to make a Hatch mini which can be plugged in, and we still travel with ours. But we sometimes bring our full Hatch Rest because we like to be able to control the volume of the Hatch via WiFi (e.g. if we’re packing and making a lot of noise, we turn up the volume). Otherwise, we bring the portable Hatch that allows us to use the same rain white noise that we use at home for our kids to get a good night’s rest while traveling. While it lasts all night on a single charge, we charge it during the day just in case.
- Travel nightlight – Especially when our kids were younger, this dimmable touch nightlight was helpful for middle of the night feeding sessions, diaper changes, or anything in between. Several years later, we still travel with this light and sometimes use it as a nightlight for the hotel bathrooms if needed.
- Extension cord/power strip – This has been such a lifesaver in hotel rooms where there are limited outlets in weird places. We’ve used this power strip multiple times to plug in our Slumberpod fan, Hatch Mini and Nanit camera without any issue.
- Nanit Pro cameras – We always travel with our Nanit cameras for peace of mind, especially to keep an eye on our kids in their Slumberpods/rooms. You could also bring a non-WiFi baby monitor, but found it less good quality, and I didn’t like the option to keep track if we hired a babysitter or stepped away from the hotel room. Also, pro tip – if you travel with an iPad, you can use that for when you have babysitters so they don’t need to download the app on their phone. We always travel with an older iPad for the kids and use it as our Nanit monitor.
- Note, Nanit cameras need a Flex multi-stand when traveling, and if you’re planning on using them in a hotel with public WiFi, you will need to bring a travel router as well. Read more about how to set up Nanit cameras in hotels or on public WiFi networks below.
Using a WiFi camera such as the Nanit while traveling with non-password protected WiFi
Nanit Pro cameras – and other WiFi based cameras like Wyze, Lollipop, and Nest – don’t typically work on public WiFi networks that aren’t password protected like what many hotels have. But I thankfully found a workaround so you can bring and use your Nanit at any hotel while you travel and encounter no password WiFi networks… all it requires is a travel router. This travel router set up also supports connecting Hatch sound machines as well!
IMPORTANT: Before you go, purchase a travel router to bring along your trip, such as one by TP-Link or GL.iNet. I found this TP-Link one to work just fine but there are fancier versions out there like this one that promise better speeds. (affiliate links)
How to connect your WiFi camera on a public hotel network:
What you have to do is to connect the travel router to the public wireless network using the Hotspot/WISP mode – this essentially turns the router into a hotspot with a password-protected WiFi network. I generally connect everything using my mobile device, but I’ve used my tablet before without issue with the following instructions on WiFi.
Hot tip: Connect your travel router first to the hotel WiFi before any other device in case the hotel has any limits to how many devices can be connected to the WiFi from your room at a time. You can connect multiple devices to the travel router (but which will only count as 1 device as far as the hotel knows!)
Set up instructions
- Plug in your travel router: Most will need to be plugged in to operate, usually via USB.
- Connect to the travel router: On your cell phone/tablet/laptop, pull up available wireless networks. Select the name of the router network, which can usually be found listed on the back of the travel router itself. You’ll likely be asked to enter a password, which should be provided with the router instructions. You’ll be able to change the router network and password at a later point.
- Connect the router in WISP/Hotspot mode: Log in to your router and follow the router instructions to connect to the public hotel network in Hotspot/WISP (Wireless Internet Service Provider) mode. For instance, using this TP-Link router, you’ll be able to do the following:
- Using a web browser on your device, visit http://tplinkwifi.net and follow the Quick Setup Wizard instructions, selecting WISP/Hotspot Router Mode.
- Select the WAN Connection Type. When using the router with a hotel network, select Dynamic IP.
- Select the public hotel network from the list of available wireless networks (if there are multiple, choose the one with the highest signal strength at the top of the list), click Connect
- Go to the router’s status page to check if you’ve successfully connected to the hotel network.
- Note: For some hotels, you may need to open up a new browser and login the hotel WiFi network (for instance, using your last name and/or room number) to actually connect to the Internet.
- Plug in your WiFi-based camera: Plug in and set up your camera. If you’re using a Nanit camera, it will only work when traveling if you have a Nanit multi-stand (sold separately).
- Connect your camera to the wifi: You’ll have to pair your camera to the new travel router WiFi network.
- If using the Nanit, you can do so via the Nanit app by clicking [Baby’s] Settings via the top left navigation menu, then scrolling down to Network > “Pair Nanit with our network”. Follow the instructions on how to pair your Nanit to the network – which will involve you pressing the small WiFi button on the back of the camera until the light flashes, selecting your travel router network, and making sure the Nanit is connected.
Once you connect your Nanit or other camera to the travel router WiFi network, you should be set to go! Double check to ensure you can see the video of your crib clearly, but you should be able to use your Nanit when traveling now. As another bonus, since some hotels cap how many devices can connect to the Internet per room, using a travel router allows you to connect multiple devices to the hotel WiFi network without any restrictions!
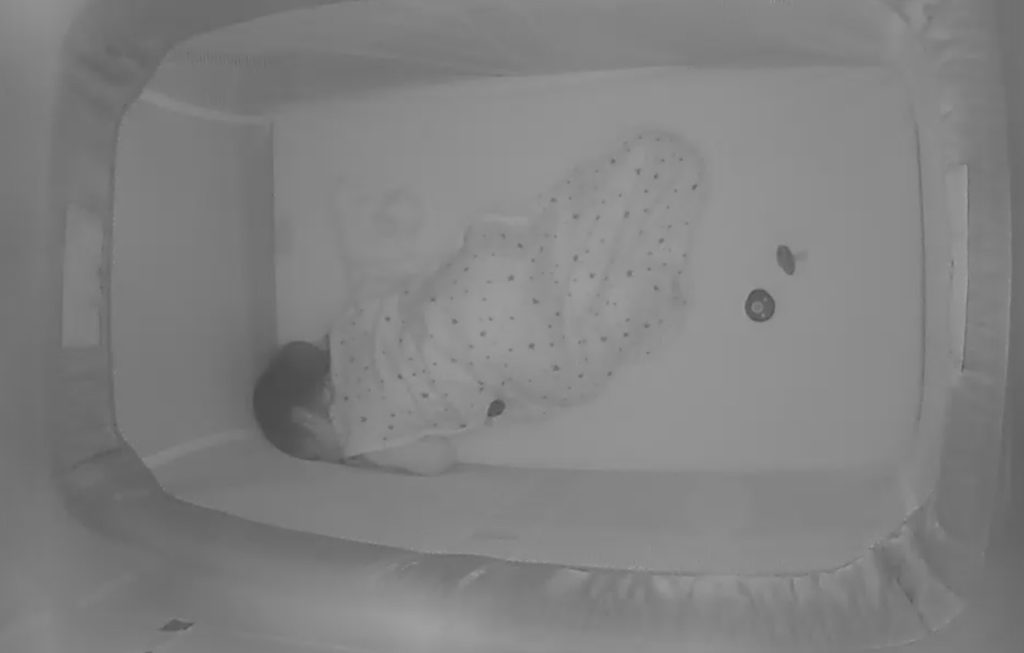
One note: If you’re using the Nanit camera with a Slumberpod, they advise you to install the camera sideways in the camera pouch. I found it best for the multistand bottom to be on the left, so the cord comes out at the end closest to where the zipper is. Press the plastic up against the camera face for the best picture quality. It may take a bit of maneuvering, but I’ve found the picture quality on the Nanit to be quite good while traveling. Sharing a photo of what the picture quality is like taken from my Nanit app, with the camera in the Slumberpod while on hotel WiFi without a password protection.
Hope this helps you have additional peace of mind while traveling with your kid(s). To keep your children entertained while out and about, check out my post on the best travel toys for toddlers and young kids. Happy travels!

6 Comments
The Best Restaurant and Travel Toys and Activities for Toddlers and Little Kids · VC in the Kitchen
June 29, 2025 at 3:35 am[…] excursions so you can get some screen-free peace and quiet on the go! Also be sure to check out my post on must-have travel items when traveling with babies and toddlers, including a tutorial on how to use a Nanit and other wi-fi cameras in […]
Sofia
June 2, 2025 at 2:09 pmCan you use the router without a laptop (with just an iPhone or iPad)? Thanks for this helpful post!
Victoria
June 30, 2025 at 12:24 amSorry for missing this earlier, but yes! You can easily use and setup the router with just an iPhone or iPad. We almost never bring our laptop on vacation 🙂 Just follow the instructions above on your phone or iPad and it should work just fine.
Allison Lindberg
April 7, 2025 at 1:15 pmThank you so much for this post, it is so helpful. Did you use this router when traveling in Europe at all? We go to Portugal for 2 weeks in May and would love to be able to bring our Nanit.
Victoria
June 1, 2025 at 9:13 pmI’m so sorry for missing this comment earlier! We did use this router internationally as well, with no issue. Hope you were able to use your Nanit in Portugal!
Catz on the Move: 5 Nights in London with 5 Kids - Catz in the Kitchen
June 26, 2024 at 6:50 pm[…] the hotel’s WiFi, allowing us to setup and access the feed from the baby monitor (credit to VC in the Kitchen for this great solution and detailed […]